Automated welcome series is a great way to engage your newly added subscribers and introduce them to your brand and product. This is especially important if you are running a D2C brand, newsletter or any business which could benefit from staying connected to your users.
In this article, we’ll go through step by step process of everything you need to know before starting your welcome automation series.
Start collecting emails
The first and most crucial step is to have your email contacts in place and ensure they automatically keep coming in. There are multiple steps to achieve this with EmailOctopus.
We’ll discuss them all and let you know which one is best in which scenario.
Using signup forms
Signup forms are the most effortless setup to start collecting emails and storing them on your list on EmailOctopus. This works great if you have a dedicated section or popup on your website for users to signup for your newsletters.
Follow these steps to create your signup form on EmailOctopus:
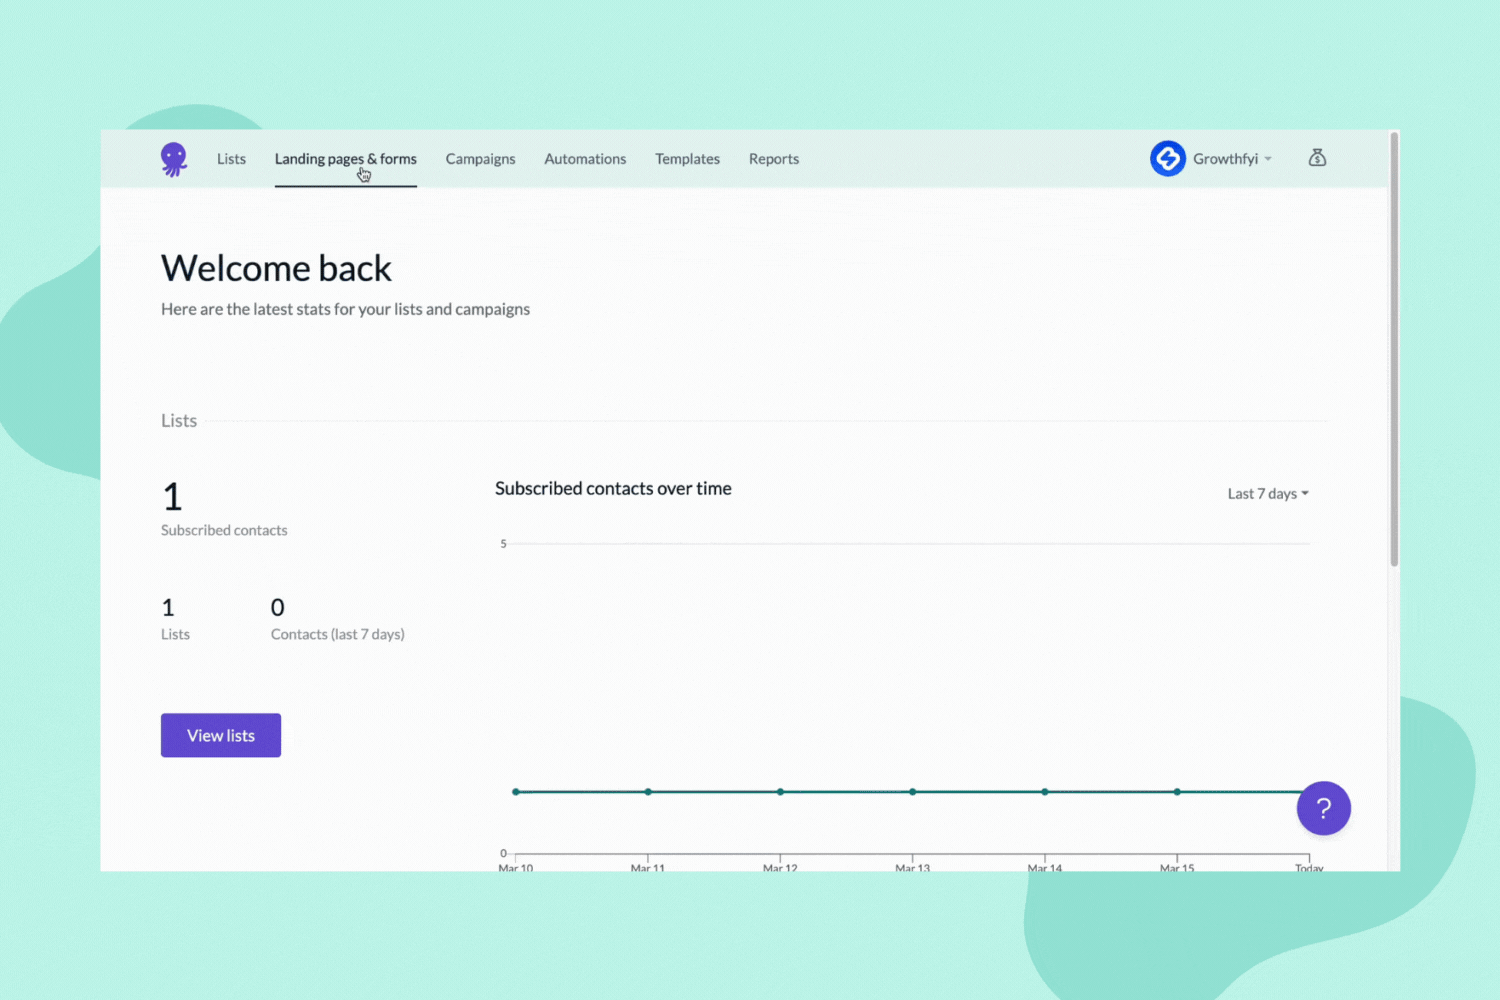
To create a signup form, you first need to log in to your EmailOctopus dashboard and navigate to the “Landing pages & forms” tab.

There, click on the “create” button and choose the form. Post that, you can select your list (where the signup form will send contact) and the placement of the form.
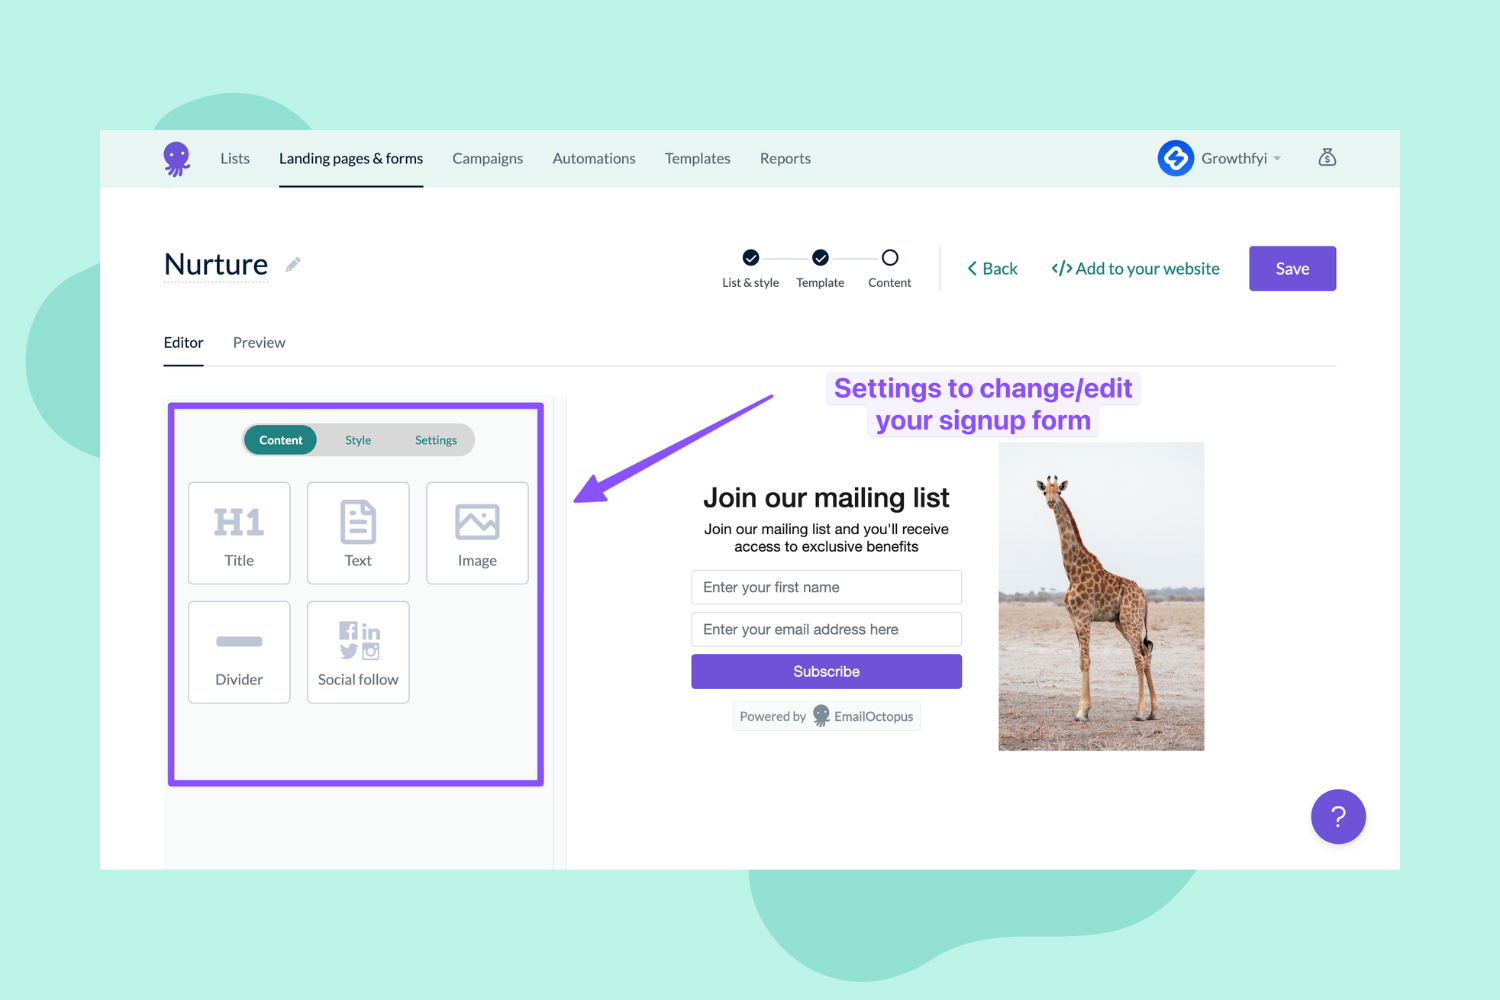
Now click a form template and use as it is or change it based on your requirement. You can easily change the content, colour and design to match your branding and complement your website design.
Using integrations
You can also natively integrate EmailOctopus with platforms like WordPress, Payhip, etc. However, for platforms like Shopify that don’t have a native integration, you can use either Zapier or Make to ensure the contact is passed seamlessly to your list inside EmailOctopus.
Integrations are highly recommended for all e-commerce sites. For example, the user doesn’t have to sign up for your newsletter or automation flow manually; all happens when they place an order or sign up on your website.
Manually adding contacts
Manually adding contacts is only recommended when the above mentioned options aren’t viable or impossible to implement in exceptional cases. It’s generally not recommended because it needs a lot of human interference, and data doesn’t come to EmailOctopus in realtime, unlike what you would achieve with signup forms and integrations.
This is a helpful case, though, if you have a list that was created before you started using an email marketing tool and what to do with an automated email campaign.
Plan your content
In the automation flow the next and most crucial step is to start planning content for your email series. Of course, this part is subjective, and everyone’s content and flow might look different.
This is why you must find the best flow and sequence by trying to learn what your users need to know.
Here’s a sample flow with the content idea to show you what the process looks like:
Assume you are an e-commerce brand and want to educate your new contact about your brand and offering; in this case, the below flow is something to consider.
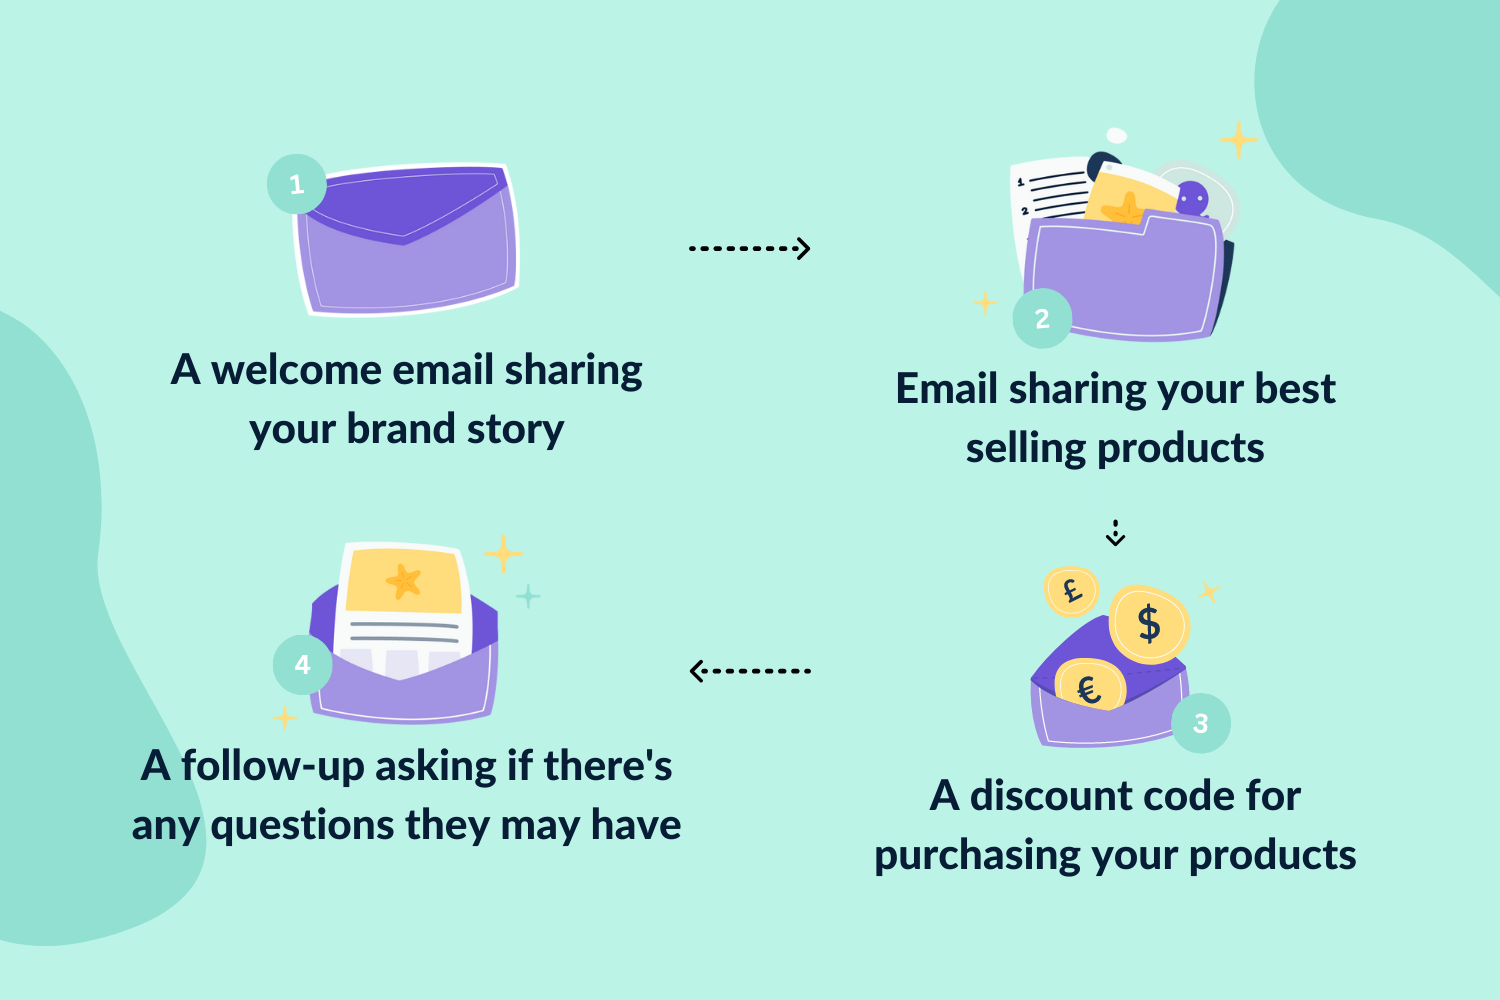
Again, this is just an example; your flow can completely differ from what’s shown above.
Setup automated welcome series
The final step is to design and set up your welcome series. Let’s go through the entire process of creating your emails and setting up your welcome series.
The first step is to log in to your EmailOctopus dashboard and navigate to the automations tab.
Then click on create automation, give it a meaningful name and select the list on which you plan to run the automation. Just so you know, any new contact that gets added to this list will automatically receive emails from this welcome series.
Once you pass the above screen, you’ll be greeted with 6 options as “triggers”, which will mainly trigger the start of automation for that particular contact.
As it’s a welcome series, you’d be better off picking the first one, triggering the automation sequence when a new contact is added.
What this will do is that whenever a new contact gets added to the list, it will enable automation for that particular contact.
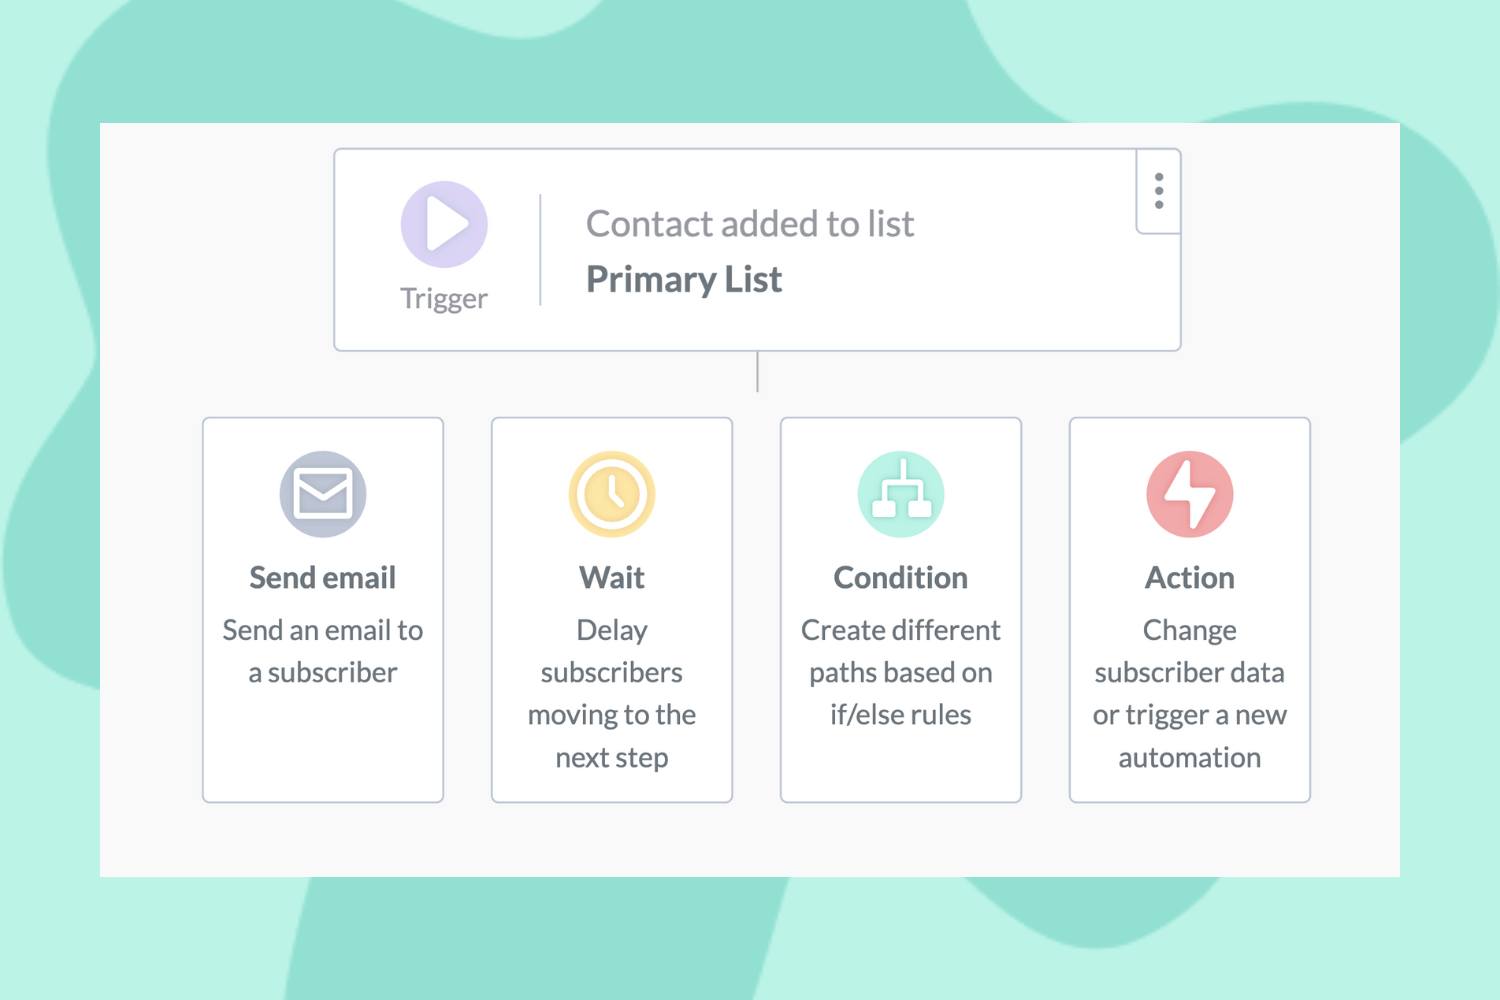
Passing this screen will take you to the automation flow builder UI where you can quickly build the complete flow.
To start, you need to click the “+” button, and you’d be given 4 options.
- sending an email
- waiting for a specified amount of time
- filtering contacts based on conditions
- performing an action on them (changing their data or adding them to another automation).
For a most welcome series, choosing either the first option (directly send email) or the second (add some delay before sending the first email) would be meaningful. Though these 2 are general choices, from case to case, you might choose the other options based on your requirements.
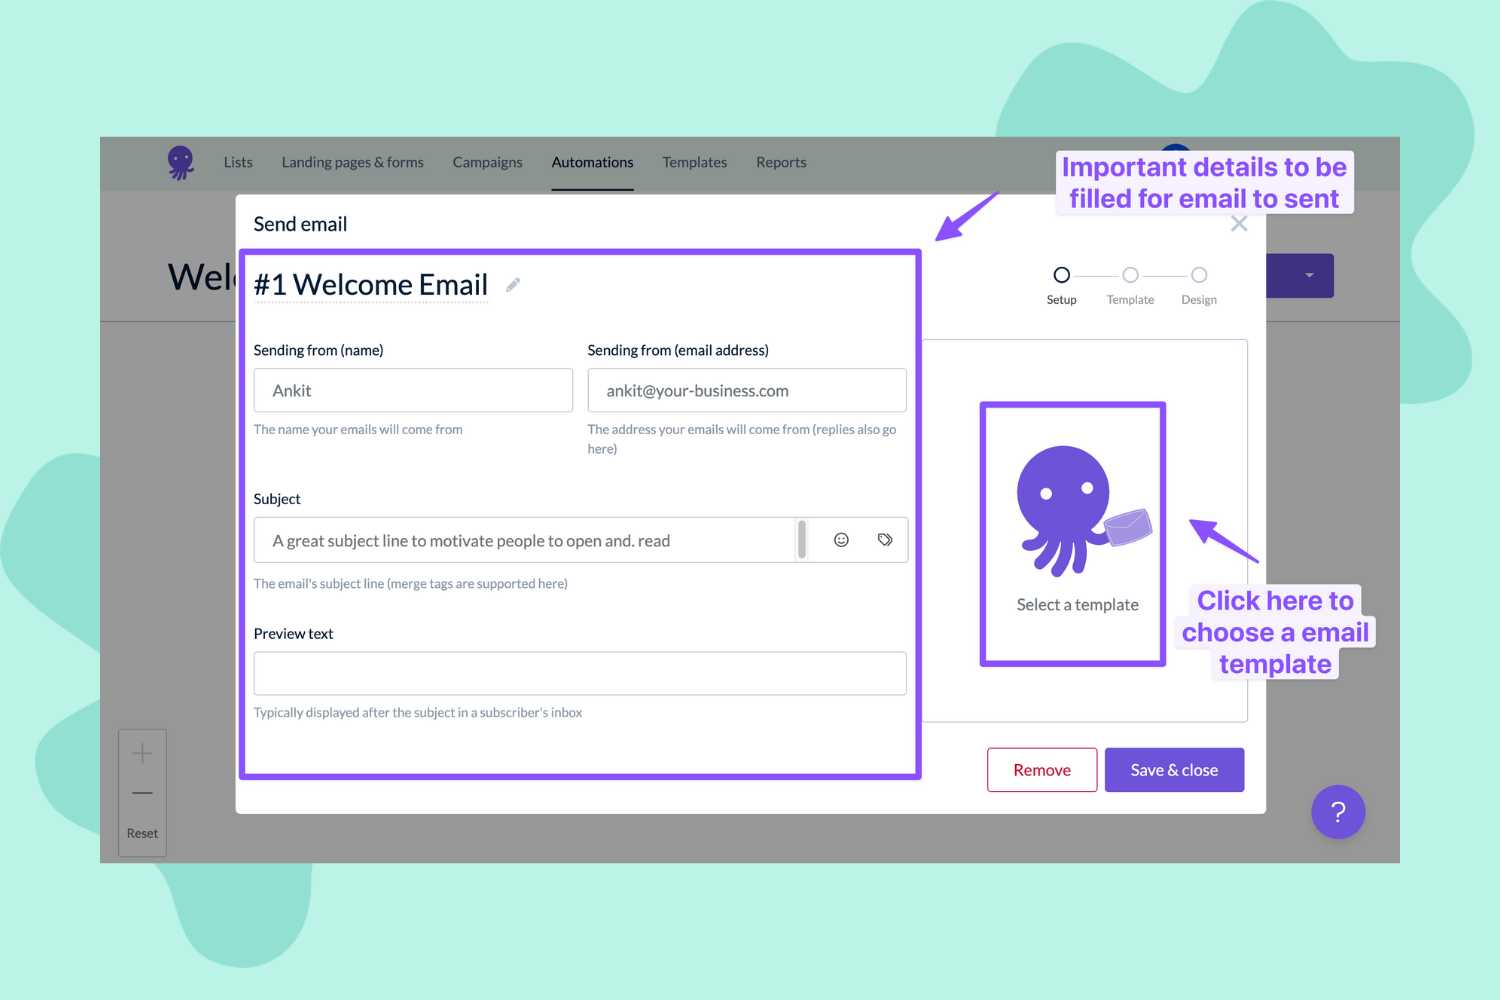
Once you have a clear idea of what to do, you can move to creating your first email of the welcome series. To do this, you need to click the email block and fill in the details asked and choose an email template.
For email templates, you can either build your own or choose from our collection of pre-made templates.
Now you need to keep repeating this with additions of other items like delays, conditions and action until you have created a perfect sequence for your welcome series.

Test and optimise
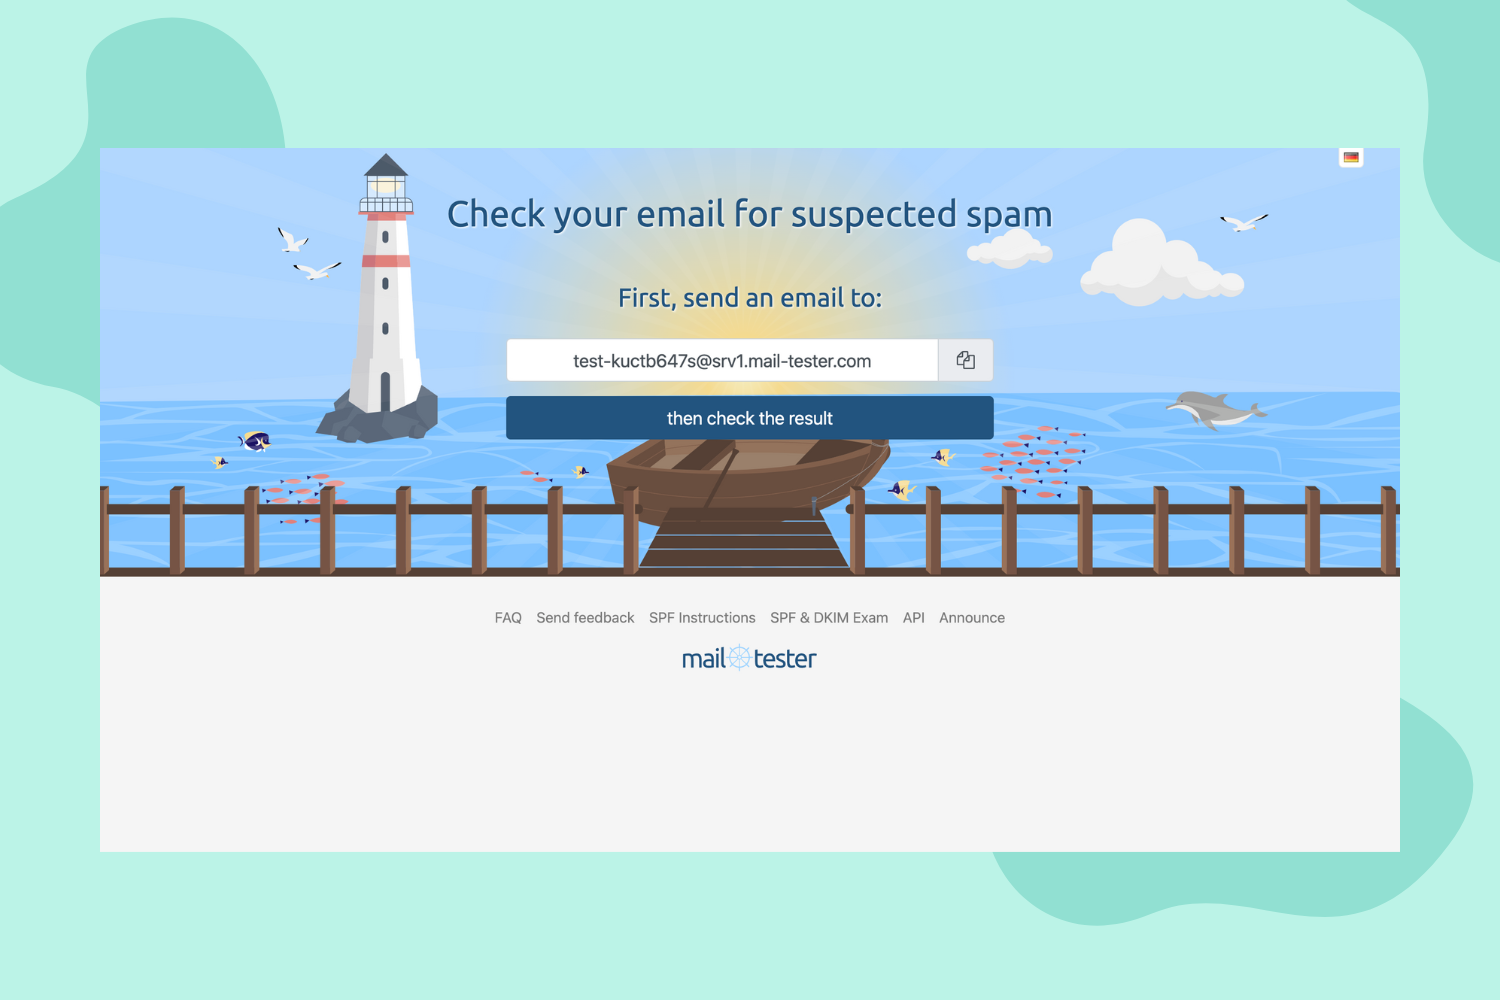
Now that you have completed the setup and are ready to turn on the automation, it is important to test all the emails beforehand.
Testing allows you to ensure everything is working as expected and fix any issues before subscribers receive emails. To test your emails, it’s recommended to use something like Mail-Tester and also send the same email to your personal inbox and check it if everything is as it should be.
Once you have tested the automation, you can optimise it by analysing the performance of each email and making changes to improve engagement and conversion rates. With a well-designed and optimised, automated welcome series, you can increase customer loyalty and drive revenue for your business.
Conclusion
In conclusion, automated welcome series is an effective way to engage with your newly added subscribers and increase customer loyalty.
Following the steps mentioned above, you can create an effective automated welcome series that will help you introduce your brand and products to your subscribers. Remember to plan your content, test your emails, and optimise your automation for the best results.

No Comments
Leave a comment Cancel