Email marketing is essential for most businesses. Moving email platforms can be difficult because it’s not often done and there aren’t any automated ways to do it. While this can be a tricky process, it is not impossible.
The key is to create and follow a migration checklist to ensure every step is completed, reducing the chance of errors. In this blog post, we’ll go through the reasons to migrate, the migration checklist, and common issues that you might face.
Why migrate to a different ESP
There can be multiple reasons to switch to a different Email Service Provider (ESP), but it’s necessary to thoroughly evaluate the effort-to-benefit ratio before starting the migration process. This helps ensure that the transition is both essential and practical, preventing unnecessary hassle.
Pricing, features, or privacy requirements should be your primary reasons for migrating. Choosing an ESP with better pricing can save you money over time. Improved features can offer better tools for email marketing, making it more efficient and effective. Privacy is also important; following strict rules can protect data and build trust with your audience. However, switching just for cosmetic reasons or minor improvements might cause unnecessary disruption without significant benefits.
Pre-check before migration
To ensure a smooth migration process, it’s essential to conduct a series of pre-checks. This prep work is needed to address potential issues and eliminate risks.
List cleaning: It’s important to thoroughly clean your email list before migration. Since the new Email Service Provider (ESP) won’t have access to historical data to remove inactive subscribers in the future, it’s up to you to manage this task. Moreover, review your list and remove any non-existent/dormant email addresses to prevent problems after the migration. This step helps maintain a high-quality list and improves the performance of your email campaigns.
Update your privacy policy: If your website or business serves people from the European Union, you must follow the General Data Protection Regulation (GDPR). It is necessary to list all your data subprocessors within your privacy policy. Therefore, make it a priority to update your privacy policy by including the details of the new ESP. Staying compliant with the GDPR is not only a legal obligation, but also demonstrates your commitment to data protection and builds trust among your audience.
Creating backup: Last but certainly not least, make sure you have complete backups of all important things such as your subscribers (and unsubscribers) list along with all the custom data associated with it.
Migration checklist and steps
Now that we are done with pre-checks, let’s move to the migration checklist and see the best way to migrate to a new ESP.
Adding business information
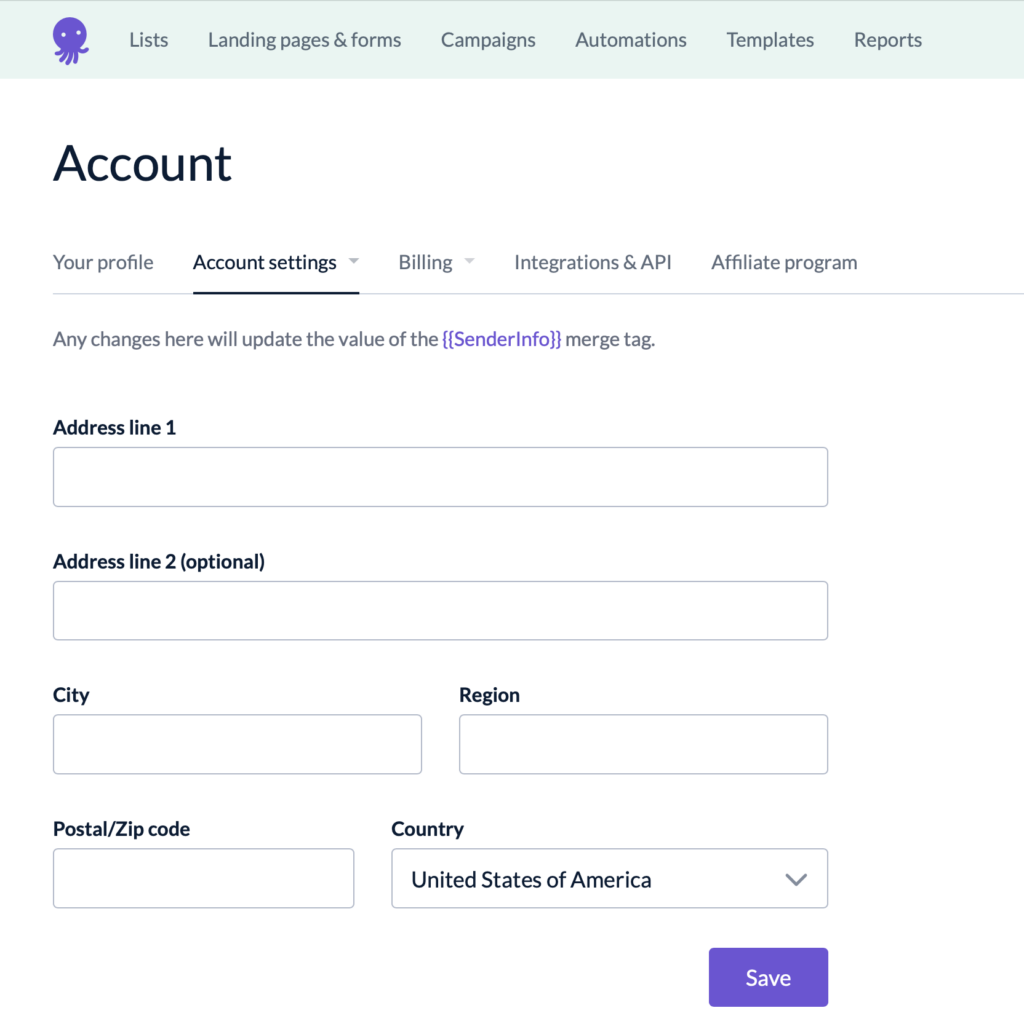
The first and most important step is to add accurate business details, such as your company or organisation’s name and the sender information, which includes your complete address. This is not only a best practice, but also a mandatory step according to multiple privacy laws and regulations.
To do this on EmailOctopus, navigate to your account settings. You can add or update your business information in the Sender info tab.
Verify Domain
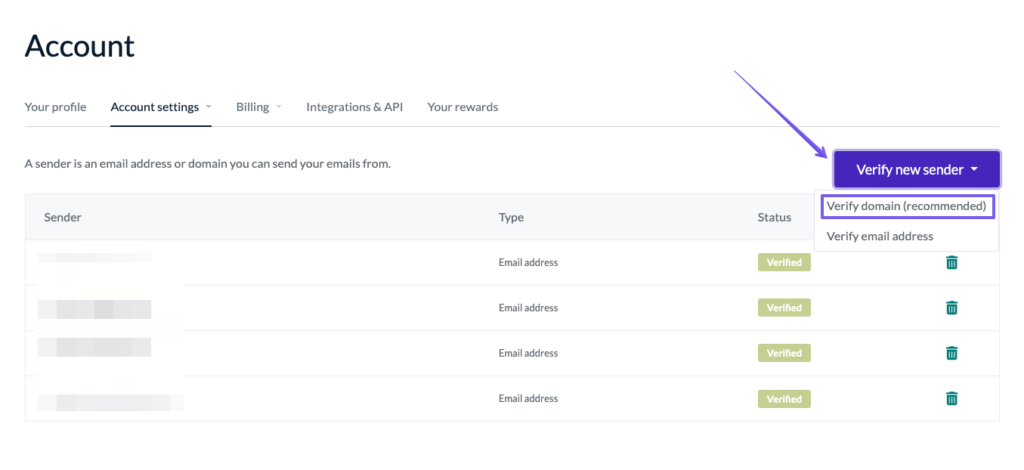
Next, you need to verify your sending domain, which can be either your main domain, such as example.com, or a sub-domain like mail.example.com. It’s always advisable to verify the domain using DNS rather than performing email verification through a link click. Full DNS verification allows you to build your sender reputation and achieve better results in the short and long term.
To begin, navigate to your accounts page on the EmailOctopus dashboard. Once there, proceed to the “senders” tab located within the account settings. Simply add your domain and follow the step-by-step verification process.
We have a detailed guide on how to set up and validate your DNS records. Don’t hesitate to contact our support team if you come across any issues.
Recreate automations
Now that you’ve verified your domain, it’s time to recreate any existing email automation that you had in your previous ESP. Before doing this, keep in mind that your new ESP won’t have access to past user activity data, so automations based on user activity, such as “last_opened,” might not function as expected. All your customised tags must be manually transferred from your previous ESP to the new one. This step is important to make sure that automations using custom tags or fields work well without errors.
Refer to this documentation to learn how to set up automations in EmailOctopus.
Recreate signup forms and landing pages
It’s also essential to recreate your signup forms/landing pages and ensure they are configured properly. When doing this, keep in mind to create a list of unsubscribed contacts to prevent them from re-subscribing or being accidentally re-added to the list as “subscribed”.
You can also use integrations like OptinMonster, WPForms and others for easier setup and management.
Migrate contacts in batches
Although this step isn’t mandatory, it is highly recommended. Typically, most people tend to transfer all their email contacts simultaneously to the new Email Service Provider (ESP). However, this approach may lead to various deliverability issues.
This is why it is recommended to migrate your email contacts in smaller, manageable batches. Also, it’s better to transfer the most active contacts first. These contacts are more likely to open emails from the new ESP.
This simple change helps inbox providers such as Gmail get used to the new sending volume of your domain and the new IP address.
Test your email campaigns
Once you’ve done all the setup, it’s time to test everything. Start by sending test emails to yourself and try opening them on different devices (e.g., Mac, PC, mobile, etc.) and using different email clients and browsers.

If everything looks fine, then you are ready to go, but just to be extra sure, you can send a test email to Mail-tester, too. This will automatically test your email for errors and will let you know if anything is wrong.
Ask for help when needed
Though the checklist/guide above is more than enough to help you migrate smoothly, something might still confuse you or cause an error.
If this happens, the best way to solve it is by reaching out to customer support for help. Regardless of which tool you are migrating to, the support staff will always be available to help you figure things out.
Conclusion
That’s everything you need to know to perform a successful migration. Stay calm and follow each step at your pace to ensure nothing is missed.
If you’re still looking for the right email service provider or haven’t chosen one yet, consider trying EmailOctopus. It’s free to start, so you can test its features and see if it suits your email marketing needs.

No Comments
Leave a comment Cancel